Basics of Fishing Photography
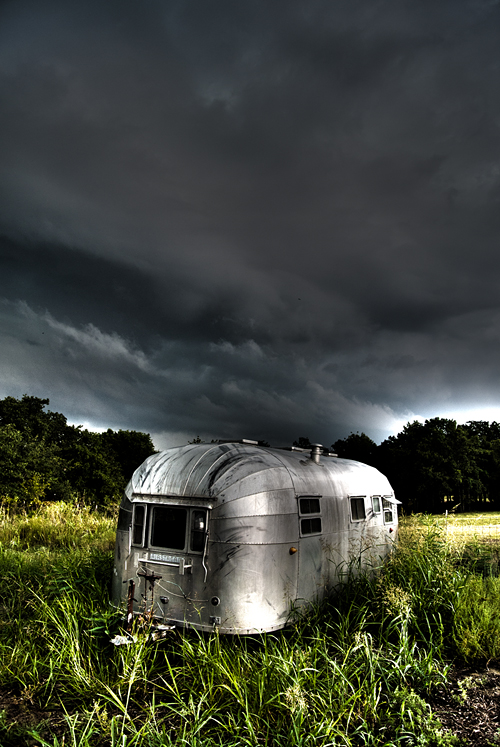
This image of an Airstream Trailer began with an accurate exposure.
When I am blessed enough to spend some time with readers on the water, one popular refrain contains the words, “more information on photography” in lengthy conversations about what they would like to see more of on Texas Fly Caster.
Now, I have been doing the photography thing 25 years as of this year, and in all this time I have consistently said photography is who I am, not what I do. In fact, until cycling and fly fishing became important, I was one of those people who would fill out those somewhat annoying “bio” or “hobbies” or “interests” boxes with one thing – photography. That’s it, photography.
Sure, I have had a love affair with music for about 38 years, but it was never hands on, like so many other hobbies. I guess that was more of an ears-on experience, one that lead to very little high frequency reception as time goes on.
TRAINING
I guess you could say I had what could now be called a “Classic Photography Training” that included every single photographic process except Kodachrome processing – either as part of my education, or in labs and darkrooms from California to here in Texas. As far as education, I was lucky enough to be trained in two schools of thought – a minor in art and a major in photojournalism. One was down and dirty, while the other preached the classic Zone System. On one hand, I printed wet negatives on deadline, and on the other, we tweaked our processing times of true black & white film to take into account variables in our individual camera’s shutter speeds. Technical stuff.
Fast forward, slowly, to the last decade when the digital revolution began, and I was quick to get on board because I could see that being in control of the entire process from beginning-to-end was invigorating and a boon to control freaks (like myself in photography at least). It took awhile to complete the transition because the lack of archival printers and printing techniques early on left my digital files relying on other’s interpretation of how an image should look. And more often than not, the printers were blazing trails too. Their quality wasn’t there yet. By 2004 and going into 2005, due to economics and growing camera, computer and printer power, my transition from film to digital was all but complete.
Enough said.
LESSON I: GET IT RIGHT THE FIRST TIME
Exposure is the critical component on which all great photographs are founded.
Never has it been so easy to capture an accurate exposure – never. Gone are the days of waiting for your film to get back to, “see if you got it.” Digital photography brings instant gratification, and it brings instant pitfalls* as well.
How do you get a “good exposure” with your digital camera out in the field in some of the worst conditions a camera will ever experience?
First: Know Thy Camera. You have to know how your camera works, as in where the controls are and how to change them. This never ends. I have a brand new (to me) Nikon D800 DSLR, and I have read and reread the manual that comes with it. And I have also downloaded that manual PDF file to my iPad so that I can do targeted search, enlarge the print and carry the thing with me everywhere. Do yourself a favor and download the PDF file for your camera, and read that instead of the paper manual with the two point font.
Second: Once you know your camera, know what its strengths and weaknesses are. I have a Nikon Pro V1. It goes with me just about everywhere that I can keep it dry. It has a glaring weakness in design. The rotating mode dial on the back of the camera is exactly where your thumb rests, so I know I have to check it every time to make sure I didn’t change it from still to video, or some other setting. And sliding it into a tight bag compartment typically rotates the dial as well. Bad, very bad. This camera is so good that the good outweighs the bad handily.
Once you know your camera, the odds of getting a good exposure increase exponentially. And that’s because you can recognize situations where your camera is getting “tricked” by certain lighting situations.
An accurate exposure happens when the correct volume of light for a particular scene is reflected into your sensor giving you a good file to use as is, or to begin a digital manipulation of that image. Accurate exposures are made using the correct f.stops and correct shutter speeds. Yeah, but what’s an f.stop or shutter speed? After teaching classes on this for years, I have had an opportunity to distill what these two variables are.
F.STOPS – F.stops are controlled in the lens, and do two things: 1) they control the amount of light passing through the lens, and 2) control the depth of field captured in the image.
SHUTTER SPEEDS – Shutter speeds are controlled in the camera body, and do twon things: 1) control the time light spends hitting the sensor, and 2) dictate the amount of movement visible in the captured image.
If your camera has the ability to shoot RAW or jpeg images, you may have wondered what that means. Let’s just say (when discussing exposure) jpegs require more accurate exposure than RAW files do. And once you’ve captured a jpeg, it’s always a jpeg. Whereas a RAW image can be converted into a number of different file types. If you are willing, and have the computing power and software, the vast majority of professionals shoot RAW images. Why? RAW files have a greater exposure latitude, so just in case we miss an exposure – we can tweak it later with software. Jpegs, on the other hand, have a limited range of exposure and are called “lossy” files because they throw away information in order to be compressed into smaller files. RAW images are big uncompressed files.
NEXT LESSON – “OK, so I know what an exposure is dude, but what does S, A, M and P, and all that other stuff on my camera mean?”
Category: Culture on the Skids, Photography, TECHNICAL











Thats a good looking photo.